Category Archives: Hatching And Incubation

Making A Homemade Incubators-20+ Ideas For Hatching Eggs

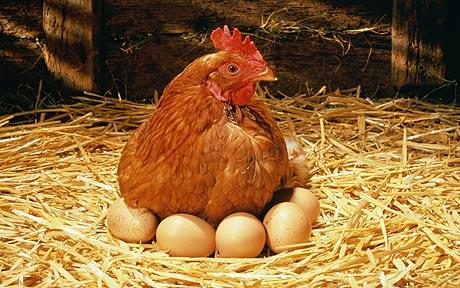
A homemade incubator is like your own mini hatchery, letting you hatch eggs whenever you need. Sometimes, hens don’t want to sit on their eggs, so having a homemade incubator can be a lifesaver. It’s something I learned firsthand when my hens weren’t broody, but I still wanted more chicks for my backyard farm.

With a homemade incubator, you can pick which eggs you want to hatch. This means you can choose the healthiest and strongest eggs from your best hens. I remember feeling proud when I could carefully select the eggs for my homemade incubator, knowing it would help keep my flock thriving and robust.

1- Open Styrofoam Homemade Egg Incubator

To create your own homemade incubator like the one from Backyard Duck, it’s surprisingly affordable, costing only $10. All you need to do is cut an opening in the top to ensure proper airflow. Using a 15-watt bulb and ensuring good ventilation, you can expect fertile eggs in just 10 days. I remember building a similar homemade incubator myself, following similar instructions, and being amazed at how well it worked for hatching chicken eggs right at home.

Homemade Incubator
Open Styrofoam Homemade Egg Incubator, image via: Backyard Duck

1- Wooden Box Homemade Incubator

To create your own homemade egg incubator following the backyardchickens design, start by searching for a spacious wooden box in your home or garage. If you don’t have one, consider asking around or checking local garage sales. The basic requirements for the incubator are simple: you’ll need a socket, bulbs, and a thermometer. I’d suggest carefully reading through the detailed construction steps provided on backyardchickens to ensure you’re setting up everything correctly. This way, you’ll be all set to witness the joy of chicks hatching in your homemade incubator soon.

Homemade Incubator
Wooden Box Homemade Incubator, image via: backyardchickens

2- Styrofoam Homemade Incubator

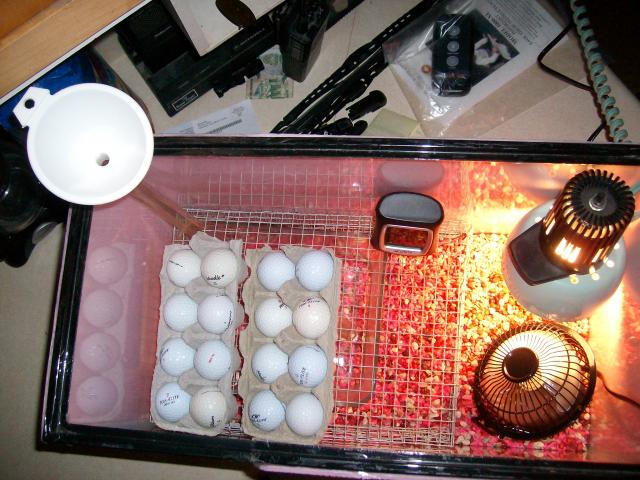
I’ve had experience with syrofoam homemade incubators, and they can be a lifesaver if you don’t have a broody mother hen to hatch your chicken eggs. The ones from instructables offer a great option, especially if you’re on a budget, as they can be made for just $30. You’ll need to gather some spare parts from around your home, but it’s worth the investment of time and effort. Based on what I’ve learned, I’d suggest carefully following the instructions provided by instructables to ensure you build the incubator correctly and efficiently. This way, you’ll have a reliable homemade solution ready to hatch your eggs in no time.

Styrofoam Incubator
Styrofoam Homemade Incubator that cost you only 30$ to build, image via: instructables

3- Homemade Drawer Incubator

We like this DIY incubator plan by backyardchickens more than the others as it has an auto turning facility for 20 eggs that is an integral part of hatching eggs. Look for identical old drawers in your storage space or buy the recycled one from the market. You need to have 2 drawers attached so that required depth can be created.

DIY incubator
Homemade Drawer Incubator with auto turning facility, we love the way how it is made, image via: backyardchickens

4- Styrofoam Broccoli Box Homemade Incubator

You can find it on any grocery store easily. With basic skills and simplest items you can create incubator for hatching eggs like this one by nanaglenmum with your convenience under safe conditions.

Styrofoam Broccoli Box Incubator
Styrofoam Broccoli Box Incubator, image via: nanaglenmum

6- Vanity Cabinet Homemade Incubator

I’ve personally found the homemade incubator from Backyard Chickens to be fantastic. It offers ample space, clear viewing windows, strong ventilation, and a sleek design. In my experience, it’s perfect for handling large batches of eggs, with the capacity to hold over 200 if needed. If you’re dealing with significant hatching demands, I highly recommend considering this option. With its features and capacity, it’s a reliable choice for successfully hatching a large number of eggs.

Vanity Cabinet Incubator
Vanity Cabinet Incubator, image via: Backyard Chickens

7- Inexpensive Homemade Incubators

Read good information on how different incubator plan like this one by raising-happy-chickens works and what their utility is. Not all the inexpensive plans would bring fruitful results to you; they might turn out to be a failure. Therefore, chose wisely before making the right choice so that you end up having lots of little fellows running around in your backyard. You need chick brooder when you have little chickens comes out from the incubators.

Inexpensive Incubators
Inexpensive Homemade Incubators, image via: raising-happy-chickens

8- Styrofoam Cooler For Chickens

Understanding airflow and temperature is crucial for any successful homemade incubator project, like the one by stormthecastle. In my experience, proper bulb adjustment is key to success; otherwise, your eggs could be at risk. However, keep in mind that due to limited space, this plan may only accommodate 4 or 5 eggs at a time. If you’re fortunate, you might find a larger box at your local store to adapt the same plan. Embrace the creative process and solve your hatching needs affordably.

Styrofoam Cooler For Chickens
Styrofoam Cooler For Chickens, image via: stormthecastle

9- Styrofoam Box Homemade Incubator

This simple idea produces great results. This homemade egg incubator by instructables starts out with an ordinary Styrofoam food cooler. Follow these easy instructions that will show you how to add a few pieces of wood and some electronics and you will have a homemade incubator that will hatch eight eggs for you.

Styrofoam Box Incubator
Styrofoam Box Incubator with an ordinary Styrofoam food cooler, image via: instructables

10- Cardboard Box Incubator

Sometimes, despite hens laying plenty of eggs, they won’t sit on them for hatching. I’ve faced this issue before. That’s where making an incubator from a cardboard box comes in handy; it takes care of hatching the eggs for you.

Using just a couple of boxes, a small watt light bulb, and a few other items, you can select and hatch eggs from your best laying hens. I’ve tried this method myself, and it’s surprisingly effective.

With almost zero investment, you can create an efficient incubator like the one by homegrownorg. I’ve found it to be a great way to have a steady supply of chicks for selling or raising. It’s a simple yet effective solution that anyone can try.

Cardboard Box Incubator
Cardboard Box Incubator, image via: homegrownorg

11- Large Egg Box

The homemade incubator by motherearthnews is a fantastic option for those in the chick-selling business. It’s something I’ve considered myself. This large egg box can handle multi-stage incubation for up to 150 eggs simultaneously. I’ve read that it can hatch 30 eggs every day, which is impressive.

This egg hatching incubator is designed to maintain a steady temperature, making it perfect for hatching chicken, duck, or guinea eggs. Based on my knowledge, it seems like a versatile and efficient solution for hatching eggs in larger quantities. If you’re in the business of selling chicks, this incubator could greatly streamline your operations and increase your output.

Cardboard Box Incubator

Cardboard Box Incubator, image via: motherearthnews

12- Wooden Egg Hatcher

This simple and effective design will enable you to incubate and hatch a few chicken eggs during the winter as a fun family project. Follow these detailed instructions and create a DIY incubator like this one by hobbyfarms with your kids, then let the kids monitor the progress of the eggs for a few weeks until they hatch. The incubator is small enough to remain in the house, but large enough to incubate 6-8 eggs.

Wooden Egg Hatcher
Wooden Egg Hatcher, image via: hobbyfarms

13- Auto Turning Hatcher

Turning eggs during the incubation process is crucial for successful hatching, but it can be time-consuming. I’ve experienced this myself. This unique design by piwakawakavalley solves that problem by gently turning the eggs automatically. It’s something I wish I had when I was hatching eggs manually.

Chicken eggs require turning three times a day throughout their three-week incubation period. For those with busy schedules, this can be quite challenging. With this auto-turning hatcher idea, you can free up valuable time while still ensuring successful hatching. Based on my knowledge, this innovation offers a convenient solution for busy poultry enthusiasts. If you’re looking to streamline your hatching process and reduce the time commitment, I highly recommend giving this idea a try.

Auto Turning Hatcher
Auto Turning DIY Incubator, image via: piwakawakavalley

14- Solar Powered Homemade Incubator

Using a solar-powered egg hatching machine like the one from instructables is a game-changer, especially for off-grid living. It’s a concept I’ve found intriguing. This innovative incubator keeps eggs at the ideal temperature range of 99 to 102 degrees Fahrenheit without relying on electricity. It’s fascinating how it utilizes renewable energy to power the incubation process.

With this solar-powered incubator, you can keep costs low while maintaining high production and profits. It’s a win-win situation that I’ve seen firsthand. By reducing reliance on electricity and utilizing solar power, you not only save money but also contribute to sustainability efforts. If you’re looking to invest in an eco-friendly and cost-effective solution for hatching eggs, this solar-powered incubator is definitely worth considering.

Solar Powered Incubator
Solar Powered Incubator, image via: instructables

15- Cooler Homemade Incubator

In this idea we will learn how to transform a large, ordinary, insulated cooler into a functioning homemade egg hatcher such as this one by backyardchickens. This easy to build incubator can hold and incubate several dozen eggs at a time so you can always have chicks on  hand for raising or selling.

The inside rack make egg turning quick and easy. The insulated cooler helps maintain just the right internal temperature from top to bottom.

Cooler Incubator
Cooler Homemade Incubator, we just love this unique design, image via: backyardchickens

16- Freezer Homemade Incubator

Transform an old, non-working freezer into a highly efficient homemade incubator by backyardchickens with these detailed instructions. Safely and effectively incubate and hatch close to 100 eggs every few weeks with this idea. The freezer insulation will help maintain a constant interior temperature for the eggs.

If you have access to a non-working freezer, this DIY build could be almost free. All the little chicks it will enable you to hatch will be profit to you.

Freezer Incubator
Freezer Incubator made using non-working freezer, image via: backyardchickens

17- 300 Eggs

If you need a large supply of chicks on hand at all times, we highly suggest you to make this homemade incubator by backyardchickens if need to hatch large number of eggs. will meet that need. It’s a wood cabinet design that is 4 feet tall will hold 300 eggs, has automatic timer, thermostat control, circulation fan and auto rotating for the shelves.

The clear glass front allows you to see the multiple shelves holding the eggs and monitor the interior heat and humidity. Great for placement in an unheated garage or barn.

homemade incubator
Egg hatcher with capacity of 300 eggs, image via: backyardchickens

18- Hatch-O-Bator Homemade Incubator

Use recycled parts to create this efficient Hatch-O-Bator that will get the job done with a minimal investment. Very little time and money will go into this DIY building project by backyardchickens yet you will reap big profits with all the chicks you will be able to hatch and sell.

The main building components are a few pieces of leftover plywood, a water heater thermostat and a couple of 15 watt light bulbs. Cheap to build and cheap to maintain.

DIY building project,
Hatch-O-Bator Homemade Incubator, image via: backyardchickens

19- Wine Cooler Homemade Incubator

An old refrigerated wine cooler repurposed into an egg hatcher by backyardchickens is a brilliant recycled project. It’s something I’ve considered trying myself. This innovative idea allows you to create an efficient egg hatcher at little to no cost. The versatility of being able to set it up both outside or inside your home is a plus.

The glass front of the wine cooler makes it easy to view the eggs without opening the door, which helps maintain consistent heat levels. I’ve found this feature to be particularly useful for monitoring the hatching process without causing temperature fluctuations.

If you’re interested in trying this DIY project, I’d suggest thoroughly cleaning the wine cooler and removing all the inside and electrical components first. Then, customize your egg racks to fit snugly inside the cooler box. Adding a light, fan, thermometer, and fertile eggs will complete the setup. It’s a simple yet effective way to repurpose old materials into something useful for hatching chicks.

Wine Cooler Incubator
Wine Cooler Incubator, image via: backyardchickens

20- Homemade Incubator

Follow these free instructions to build your own homemade incubator by backyardchickens that will hatch dozens of eggs at once.  The double door design will allow you to do maintenance work in the heat chamber without losing heat in the incubator.

A printed diagram plus pictorial instructions make this DIY build simple for even beginners. If you want to hatch large quantities of chicks at once, then this egg hatcher will enable you to do so with minimal effort and expense.

Homemade Incubator
Large Size Double Door Design DIY Incubator, image via: backyardchickens

21- Cabinet Style Homemade Incubator

Making an incubator like the one by rockridgefarms can be a fun project that also adds style to your home. It’s something I’ve found appealing myself. The great thing about this design is its versatility; you can hatch as many eggs as you want by adjusting the number of shelves you install. Plus, its fancy appeal allows you to place it anywhere, even in your dining hall.

Everything you need to make this incubator is readily available either at home or at a local store. This convenience makes it an accessible project for anyone interested in hatching eggs at home. The cherry finish adds a touch of elegance, making it a lively addition to any home setting.

If you’re considering building your own homemade incubator, I’d suggest giving this design a try, especially if you value both functionality and aesthetics. With its stylish appearance and practical features, it’s sure to be a conversation starter in your home.

Cabinet Style Incubator
Cabinet Style Incubator, we love the way how it is made, image via: rockridgefarms

22- Wooden Board DIY Incubator

Creating a two-level DIY incubator with eggs and water on the lower end and a fan and bulb on the upper end is a clever design. It’s something I’ve seen before, and it’s efficient. To build the outer structure, using water-resistant wooden slabs joined together is a practical choice. I’ve found that this not only provides durability but also helps maintain the desired shape of the incubator, ensuring optimal functionality.

This setup allows for effective temperature control and airflow, crucial for successful egg incubation. I’ve learned that having separate levels for eggs and water helps regulate humidity levels more precisely. With the fan and bulb positioned at the upper end, heat distribution is more even, promoting uniform incubation.

For those considering building their own homemade incubator, I’d suggest following a detailed guide or plan to ensure the construction process goes smoothly. It’s essential to pay attention to details like sealing gaps and ensuring proper insulation to prevent temperature fluctuations. By investing time and effort into building a well-designed homemade incubator, you can increase your chances of successfully hatching eggs.

Conclusion

A homemade incubator has many benefits such as cost, custom design unlike market ones that are expensive. Making your own incubators also helps you to keep your flock size larger as broody hens are not always ready to go for brooding or less motherhood habits.

You can select any of these incubators we have shown you above that best match your needs. Hope this article has guided you well in making your own incubator.

References:

Researchgate, June 2021, International Journal of Computational Science and Engineering 24(4), “Design and implementation of chicken egg incubator for hatching using IoT”, https://www.researchgate.net/publication/352777744_Design_and_implementation_of_chicken_egg_incubator_for_hatching_using_IoT

Extention University of Missouri, Revised February 2003 “Small Flock Series: Incubation of Poultry”, https://extension.missouri.edu/publications/g8353

SSRN, 18 Mar 2021, “Development and Construction of Poultry Egg Incubator Temperature and Humidity Controller (Peitch) With SMS Notification”, https://papers.ssrn.com/sol3/papers.cfm?abstract_id=3779301

Ideal chicken Incubators,egg candler For Chicken farmers

Advanced Chicken equipments Are Ideal For Chicken Entrepreneurs

Wanting to possess your personal chickens or ducks? Are you currently searching to spread out a chicken business? The great procedure for incubating and hatching eggs could be a fantastic project in class or everyone or perhaps a rewarding business enterprise. Within this venture or hobby, watching eggs hatch and turning from its eggs truly provides an amazing feeling and experience.

Egg incubators/candler are wonderful equipment and supply not just fun but rewarding experience too. Such equipment introduces you and also allows you have the astonishing realm of hatching eggs. Before starting on any egg hatching project, you should know using such equipment correctly.

If you have been different types of incubators with assorted dimensions for several types of creatures eggs like turtles, wild birds, and snakes which will match anyone’s budget and space. These come in a number of form, size in addition to cost yet they have got only one goal which would be to hatch eggs. It keeps the eggs warm and offers a appropriate atmosphere on their behalf.

You will find several incubators in addition to farm, incubation and reptile supplies in big selection from plenty of local or online farm supply stores. This equipment includes instructions and knowledge on incubating and hatching eggs. Fanatics attempt to hatch and lift their very own chicks, turtles, wild birds, ducks another reptiles by utilizing small incubation equipment. While chicken business proprietors take advantage of chicken incubators to hatch 100s of eggs at any time, consequently making the arena of egg incubating and hatching available.

If you buy an incubator, make sure to frequent reliable online farm supply stores offering a range of egg incubators at best prices. Whenever you are trying to find bird incubators or reptile incubators make sure to choose individuals that provide convenience, efficiency and cost. You may even find some that are created to be utilized by kids for varsity experiments, family club activities, scout clubs or small at-home project. Bear in mind they aren’t toys, hence children should be always supervised when you use such device.

But they must be utilized by children under adult supervision because they are not toys.

It is best to buy individuals that include fan, thermometer, automatic turning and alarm since you can leave your eggs and know your hatching status. Additionally this can help you save time and effort checking and assisting the entire process of incubation. For big incubation projects specifically for chicken farm work, automatic incubators are created using the professional chicken or bird raiser in your mind and therefore are excellent because they can hold a large capacity of eggs, have advanced features, electronic components and systems, delivering incredibly precise and effective egg incubation.

If however you are an operating kind of person you have careful analysis help make your own incubation equipment. You’ll find numerous sites that provide information about how you may make your personal quite simple incubation equipment from common electric container or materials throughout the house.

Artificial incubators are perfect for any incubating and hatching project because they prevent bad batches of eggs, saves effort and time plus produce great results.

Whether you are an enthusiast or perhaps a professional breeder it is usually better to use quality chicken incubators and reptile supplies.

Over View of Different Stages of Egg Development

Keeping chicken in your backyard is an exciting experience. Some of you however, might be thinking of hatching, raising and incubating chicken eggs. This is quite a difficult task as there is a proper timing for everything; for the incubating, for the hatching and for the raising of the hatched eggs. So let us focus on the major stages of a chicken egg right from the gestation till the hatching of the egg.

The first thing you need to know is that the hens are in a healthy and a breeding condition. For this, you need to ensure that the coop is well constructed and comfortable for the hens and the food provided is good quality food. The absence of cockerel in the coop or in the hen flock leads to infertile eggs. Therefore introduction of a cockerel into the coop is necessary in order to achieve fertile eggs. Once this is done, the eggs are fertilized and you are ready to incubate them. Remember that the incubation time of eggs is 21 days and proper conditions should be provided for proper incubation and for proper hatching of chicken eggs. The optimum temperature for incubation is 37.5 degrees. If the incubation is normal using the mother chicken, then the optimum temperature need not to be maintained but in artificial incubation this temperature requirement is one of the important considerations.

hatching eggs

Another important thing in chicken egg development is that the eggs need to be turned twice every day in order to ensure proper development of chicken egg.

If we talk about the chick development in biological terms, then the major stages are worth noticing. The egg when laid after almost 20 hours of fertilization, undergo few chicken egg developmental stages. The egg laying is followed by cleavage, which is again followed by gastrulation, which then leads to organogenesis and this eventually leads to hatching chicken eggs. Once the egg hatches with a baby chick the outer development continues and the chick changes to a hen as a result of these changes.

egg development stages

  • When the egg is laid, the egg has an egg yolk, an egg white, an air sac, a yolk balancer, membranes for protection and blastoderm (which is basically the embryo).

egg parts

  • The next chicken embryo development stage of cleavage involves the furrow development which leads to multiple cell formation and different layer formation like epiblast and hypoblast. These layers then play a role in organ formation.
  • Then the gastrulation stage comes, which begins with primitive streak. This stage helps in determining the anterior and the posterior part of the egg which later leads to head determination.
  • After this stage, organogenesis comes which is basically the organ formation stage. The organ development and the neural tube formation and development of chicken eggs finally pave the way for the hatching of the chick out of the egg. The egg then changes to an adult within 40 to 45 days after hatching.

In a nutshell, if you are interested in the chicken egg development in addition to just chick farming, you must be critical enough regarding the days and the egg development cycle.


5 Tricks to Break Up the Hen’s Brooding

What is meant by Broodiness and broody hen?

A hen is capable of laying around 1  eggs on a daily basis. Moreover, the hen does not prefer to incubate the eggs until the entire clutch has been laid. Through the use of this strategy, all the chicks hatch right at the same time. The physiological mechanisms and the broody hen symptoms change as soon as the clutch has been laid. She would want to stay above them while spreading out her wings for the purpose of keeping the eggs warm. If disturbed, she would start making muttering as well as growling sounds and may even engage in the protection of the eggs. Furthermore, she only leaves the nest for the purpose of eating and drinking only one time in a day. You would need to ensure that she does the process on a daily basis, otherwise she would be starved or would come to get the dirty eggs through her droppings. So, in lines to this, a hen is termed to be broody at the time she is raising the chicks, giving protection to them and also teaching them the methods to get their own food. Understanding the broodiness in hens is an imperative pre-requisite for the purpose of ensuring that the hens remain healthy.

Breeds of Broody Hens

The breeds of hens which are known to be broody include the Buff Orpingtons, Brahmas, Silkies, Australorp, Dark Cornish, Buff Rocks, Turkens, Cuckoo Marans and Bantams.

Below are the 5 tricks which would come in handy for the purpose of stopping broody hens.

1. Wired Mesh Cage

In terms of breaking the broodiness, you would need to make sure that she does not manage to stay on the eggs. The first trick you can use includes the construction of a cage by using a floor made of wished mesh. Then you would need to place the cage on the bricks in lines to which the floor would remain suspended. At the same time, keeping the bricks towards the outward edges would ensure that she won’t be able to sit on the eggs. So, she won’t be able to sit on the eggs in a comfortable manner and within a matter of a few days the broodiness would be broken.

broody hen a cage

2. Cold Water 

The next trick, which happens to be of a conventional nature, involves the usage of some cold water. You would need to dunk the hen in this cold water, but it should not be too much cold. In lines to this, the broodiness temperature of the hen would go down and she won’t be able to sit on the eggs in a comfortable manner. Removing the eggs as soon as the hen leaves the nest is also a trick which can be used.

broody hen in cold water

3. Caging and Isolation

Caging the hens for 2 to 3 days also comes in handy in breaking the brooding. But here you would need to ensure that the hen’s behavior might not turn impulsive. For this reasons, the cage should be placed pretty close to the eggs so she might be able to see them at all times. If the hen does not stops showing its damaging and irrational behavior, then the above mentioned tricks are to be used instead.

spreading brooding hen

4. The Dog Crate and Golf Balls Method

The golf balls method together with the dog crate is also conducive in terms of breaking the broodiness. The idea here is to replace the eggs with the golf balls. On sitting on these balls for some time, she won’t be able to remain comfortable and would eventually end up leaving the nest for longer time. In a matter of a few days the broodiness would be ended.It also also helps to keep broody hen in her own nest and not to take eggs laid by other hens

golf balls for broody hens

5. Keeping with an Active Rooster

Try to put her anywhere near a rooster who is quite active. The rooster would love to keep the hen busy at all times and she won’t be able to return to the nest. You can also put the rooster and the hen in some sort of movable pen in the yard outside. This strategy comes in handy for taking the hen out to the fresh air and sunlight. Furthermore, you can also make use of a wired pen and with no sort of nesting equipment inside, but always ensure that there is plenty of food as well as water inside the pen. It is only a matter of time that her motherly instinct would be gone and as soon as the process of egg laying would start, you would be able to know that the broodiness has gone now.

rooster and broody hen

Drawbacks of Hen’s Brooding

One purpose of raising hens in your backyard is to getting eggs, not all the times u want your eggs to be hatched by the broody hens, broody period vary according to the breeds of hens,  it may continue an average of one month, so its mean u lost lots of eggs that might have been put in your fridge. Also broody hen occupies the nesting box space and do not allow other hens to come in the nest box and don’t mind to sit on eggs laid by other hens. Another thing is your hen does not take sufficient food and water and it may result in dehydration in summer season

At the time of caging and isolating the hen, she would try to peck and escape from the cage. In doing so, there is the possibility that she might end up hurting herself. If kept away from the eggs for a long time, the problem of shuddering might also emerge in the hens. Research also suggests that isolation of the hen for a long time might result in lower egg production.

Chicken Eggs Hatching Accessories and suppliers

Egg/Chicks Hatching Accessories

Incubating and hatching chicken eggs from domesticated individuals is one of the most famous processes when it comes to commercial and large scale farming. A number of accessories and kits are used for achieving the process, which is in a number of ways pretty complex. The accessories to be used vary according to the number of chickens and eggs to be hatched. If you plan to do the hatching in the home based settings, then the some large investments and purchases may not be required. Till now, a number of refinements in egg incubation have been done by the specialists and scientists who have done years and years of research. However, the fundamental techniques of incubation never seem to change. Below are the various kits and incubator accessories used for the process which are also mentioned in a guide to egg hatching accessories/machines.

EGG CANDLER & SCALES

These scales are used in order to test and review the weight of the eggs. For those who have some experience in the farming business, the importance of these scales and devices can never be denied, as the weight of the egg is also a determinant of the price. Candling eggs alongside weighing is very crucial for the success of the farming business. Candling mechanisms enable you to have some idea about the development of the egg and the various stages it passes through before finally changing to the chick, which is the last step in egg maturation and development.

Thermometers And Hygrometers

Taking regular measurements and readings about the egg temperature is of great importance in the hatching process. Some of these best devices are also able to record and measure any changes in the overall humidity and temperature changes that might be seen from time to time. The temperatures are displayed in Celsius and in Fahrenheit, both of which are the standards. So, getting a more accurate reading is something which you should keep in mind when purchasing these devices.

Egg Boxes and Egg Trays

When the eggs are fully prepared and ready for being sent to the markets, then you should look for the personalized boxes and trays in which they would be kept and stored. Using personalized trays is necessary for pointing out the consumers and other buyers about the types of eggs. In short, egg packaging and manufacturing is dependent on the use of these boxes and trays.

Incubator Inserts and Cradles

The type and form of incubator inserts and cradles to be used depend on the egg capacity. The larger inserts are more suitable for the bigger sized incubators. Furthermore, the larger inserts are also much stronger and durable in comparison to the smaller ones. These inserts are suitable for the chicken eggs no matter what the size of the eggs might be. The same also holds true for the cradles which are also an essential component in egg hatching.

Egg Washing

Farms and hatching houses all around the world make use of a number of egg washing procedures. Typically, more than 30 % of the eggs are dirty when they are collected. A number of abrasives are used in comparison to the usage of water which is much more typical. Loofas are also used when it comes to the cleaning of the eggs. Most of these procedures are most suited for the small scale eggs, but when it comes to the commercial modes, then it is better off to make use of the immersion washers and devices. But here an important thing to note is that a number of old and low quality washers are also available in the market, so try not to buy these cheap washers.

Plastic Nest Eggs and Egg Incubator Spares

In order to keep the hens broody, the plastic eggs would always prove to be of much use. They also come in handy for the indication of the best nesting sites. In addition to this, a number of egg incubator spares are also useful for the hatching process which is to say the least pretty complex. The kits might include fans, ventilators, motors and other modulators necessary for the air control.

Heat Control and Egg Washing Spares

For the purpose of egg washing, a number of variant egg washers are used including the Rotamaid and supawash sparers all of which are very effective for the washing process. The same degree of preferences and importance should also be given to the heat control mechanisms and temperature adjustments, all of which are dependent on the use of the heat control spares and devices.

Top 4 chicken eggs hatching accessories Suppliers

1) SolwayFeeders chicken eggs hatching accessories

contact supplier


2) Maplin Chicken eggs hatching accessories

contact suppliers


3) Eggboxes.com chicken eggs hatching accessories

contact suppliers

4) Eggcartonstore.com chicken eggs hatching accessories

contact suppliers

Hatching chicken eggs naturally under a broody hen

I have a vast experience of handling 2 dozen babies at the same time – you must be thinking I have gone crazy, or just looking around; however, this is true. Babies, I am talking about my fluffy, cute and fatty hens here. When it comes to hens all the activities are fun – feeding, bathing but more specifically, I can guarantee hatching chickens is just wow! The artificial incubation is not fun because you do not get to see a different behavior and feel attachment.  The excerpt in detail highlights how to hatch chicks naturally under a broody hen. In addition, it would explain about the best brooding types of hens and their habits.

What do you think?-can an egg-laying hen would go broody? Well, that is not strange at all because it happens most of the time, especially during early summers and spring. Many backyard raisers particularly grab the fresh chicken eggs early morning so that they can sell it for money. In contrast to this attitude, many want to refresh their flocks frequently and use older chickens for flesh and money. Therefore, they let the mother hens sit of the cluster of eggs for some time so that they can get cute little babies.

Where to find a Broody Hen:

Truly, if you want to get chicks that mean you need fertile eggs – it also means you need a rooster. The second issue is hatching because you need a brooding hen for that. Not all the breeds are that way because chickens are one hell of moody creatures. Not only many farmers claim the same but also the researches have proved that some breeds of chicken are more likable for breeding. Have a look;

Buff Orpingtons:

Any idea, which breeds, is known for its broodiness. It is not wrong to say that mama hen of this breed is very loving and adores the chicks. Interestingly, you will not ever face trouble in letting this hen go for brooding; in fact, it does not mind to hatch the eggs that are not laid by her.

Buff Orpingtons

Other breeds:

Brahmas, Silkies, Australorp, Dark Cornish, Buff Rocks, Turkens, Cuckoo Marans and Bantams are even among those types that easily go for brooding. However, they may not be the ones, which are likely to sit on the cluster of eggs, which are produced by some others.

However, not all the hens are very good broody as it is a trait that is natural and cannot be acquired. They may even contribute of lesser or failed to hatch properly (so you select to break the broodiness of hen).

Signs of brooding:

Many times newbie’s or new backyard players get into chaos when the hen is about to brood. They fail to spot the common differences between a sick and a broody hen. Let us end this mess by clearly looking into the signs of broody hen;

  • Hen starts to peck hard when you try to reach her nest
  • Examine her behavior – she must be looking comfortable yet very alert about the environment
  • She must be fluffing her feathers, especially the neck area. You would be certain to hear a very sweet noise all the time.
  • Keep a look at the nest, if it has line of feathers, it clearly shows the mother feeling on her is on the top
  • Leave the nesting box shortly to eat, drink and poop.
Essentials of a broody box:

A brooding box is a private place of a broody hen; therefore, it is supposed to be comfortable and cozy. Moreover, it is supposed to be safer so that the hen does not feel insecure otherwise, she would act strangely.

The hatching process:

Normally, the duration of hatching an egg is almost 21 days. It may be a little more or less as per the breed of the chickens. You must candle the egg after few days to determine the viability of an embryo so that infertile eggs can be separate out.

Stages of egg development:

Day one:

  • Within 16 hours there is existence of the chick embryo
  • Eighteenth hour – alimentary tract develops
  • Twentieth hour – vertebral column develops
  • Twenty first hour – nervous system starts to develop
  • Twenty second hour – head starts developing and by 24th hour eyes are developed

Day 2:

  • Twenty fifth hour – heart starts to develop
  • Thirty fifth hour – ear starts developing
  • Forty hour – heart beat starts

Day 3:

  • The 60th hour – nose develops
  • 62nd hour – legs develop
  • 64th hour – wings develop

Day 4:

  • Tongue develops

Day 5:

  • Differentiation of sex and formation of reproductive organs takes place

Day 6:

  • Peak develops

Day 8:

  • Feathers develop

Day 10:

  • Beak starts getting harder

Day 13:

  • Claws and scales develop

Day 14:

  • The embryo starts moving in a manner that it can be get out of the shell

Day 19:

  • Yolk starts to enter the body cavity

Day 20:

  • The embryo is big enough to occupy the entire shell space

Day 21:

  • The chick hatches

Chicken Egg Candling Guide

Candling chicken eggs is an important part of poultry production, especially when it comes to carrying out observations about the growth of egg overtime. There are a number of phases through which egg passes before getting into a complete shape. The procedure used to observe the development of the embryo that lies inside the egg, is mainly done through the use of a bright source of light. It is this light which helps in getting an idea about how much the being has developed inside. The reason for which the procedure has been named candling is all because initially candles were used to observe the development and growth of the egg. Yes, this was indeed quite long ago. The modern lamps differ from the conventional lamps in a number of different ways. The modern lamps make use of a strong beam of light which is concentrated at one spot. Furthermore, now days LEDS are also being preferred due to the ease they come to provide being efficient, powerful and portable.

Why is candling so important

In addition to pointing out the growth of an egg, candling also helps in gaining about the fertility of the egg and the levels of weight loss that might occur from time to time. During the time of incubation, the eggs do need to lose nearly 13 % of their overall weight which should be monitored at all times. Moreover, it is this procedure that is going to helpful in identifying the dead or expired embryos before the egg comes to explode. It is all done to avoid the spread of germs which the exploding might initiate. The process of observing the incubation of chicken eggs is best done when the mother leaves the nest at regular intervals. So, this is the right time to make use of the chicken egg Candler. In times of extremely dry conditions, then an increase in the air sac size might be seen. In such conditions, the humidity of the chamber should also be increased to compete with the dry conditions. If the air space appears to be smaller, then the opposite mechanisms are applied.

Knowing the Viability of an Embryo

In the presence of a candling lamp, the embryo comes to look like a very dark shadow. The embryos which are healthy would eventually come to respond to the use of light. The time required for the movement might vary, but on when the time lies between 30 to 40 seconds, then it is a possible indication that the embryo is not healthy. Furthermore, looking at the blood vessels which are quite visible is also necessary for monitoring the growth. If, in case the embryo dies, then the blood vessels start to deteriorate quickly and soon come to appear like streaks that lie under the shell. Infertile eggs are quite easy to detect and must be discarded at the very first instant. Moreover, as mentioned earlier, the absence of movement is also helpful in knowing about the deaths, but the viable ones are those that respond to the light. Yes, hatching chicken eggs is not as easy as it might initially appear to be.

egg embryo

viable eggs

The Procedure

It is best if you candle the eggs in the evening time. In addition, you can also do the candling when the lighting conditions happen to be dim. Now here we have the equipment which is used for the procedure:

  • Pencil
  • An egg candling device or torch
  • Cartons of eggs

Procedure

  • First of all remove the eggs from the areas of the incubator and then place them in the allocated cartons
  • Dim the lighting conditions or it is better to do this in the evening time
  • Check out the embryo for each egg in front of the candle or the device you would prefer to use with an efficient amount of light
  • Remove all the eggs you find infertile and separate them from the healthy ones
  • Return all the healthy ones to the incubator

egg candler

Timeline for Candling

The best time to initiate the procedure is 3 days after incubation or on the 4th day of the incubation. In case of the fertile ones, you would see a dark spot and even some movement, but that might not be the case with those that are infertile.


10 tips for hatching chicken egg in an incubator

When I was a kid I couldn’t understand the difference between a fertile egg and the non fertile one. It didn’t make any sense to me at that time; I have been brought up in a family which adored poultry the most. With us three siblings, my father had dozen of chickens in the backyard too, and he took care of them as if we all are a family. When I was eight I used to bring a fresh egg from the dad’s farm every day for my breakfast; I always wished to get a chick when I break the shell, but that didn’t happen either. It caused me frustration many times; one fine dawn I looked at my father, he was sorting out the eggs. I could see him packing a box with fresh farm eggs which he was about to send to the grocery store. I inquired about this entire thing and that was the day when I was able to understand the clear difference between a fertile and non fertile egg.

The eggs which we consume are non fertile – this means they cannot be used for incubation. In simpler terms, incubation means egg hatching. In order to obtain fertile eggs farmers need to get them from hatcheries – this means getting the chicks from the eggs under your controlled circumstances.

You don’t need any professional help for incubating chicken eggs; in fact you can do the entire thing on your own. The excerpt would now help to know the ways through which you can hatch hen egg in an incubator.

1: Take equal care of eggs before incubation:

The egg hatchability declines, if proper attention is not paid to the egg before putting it for incubation. A few things to note down here;

  • Practically you may not place the eggs immediately in the incubator, when received.
  • You must not leave the eggs for more than 7 days, after receiving.
  • Make sure the eggs are not prone to changing temperature. Make sure it’s about 50 degree Fahrenheit.
  • The relative humidity level must be between 70 t0 80 percent in a room.
  • Alternatively you can place all the eggs in the vegetable section of the refrigerator – this temperature remains ideal for eggs before they enter into an incubator.(hatchability reduce below 40 degree Fahrenheit. Or 4 C
  • The embryo will start develop when the temperature  reaches at 27 degree Celsius.
2: Placement of incubator:
  • The room must have a temperature of 70 to 75 degree Fahrenheit for better chicken egg hatching.
  • The room where you have placed the incubator must not vary its temperature.
  • Never place the incubator where sun rays have direct access.
3: Organizing incubator for proper working:

You must have a flawless working incubator; otherwise, all your chicken eggs wouldn’t be worthy for you. In order to provide necessary heat inside the incubator, you may place a few small or large size bulbs. Most of the farmers use 40 watt bulbs because they work best. Also, make sure none of the pores are left open otherwise the entire heat would escape.

4: preparing the eggs for hatching:

Turning the eggs inside the incubator is very essential for better hatching. What you can do is, marking alphabets on either side. For example, you can write ‘Z’ on one side and ‘Y’ on the other – this would help you know which side you turned the last and what should you do at the real time.

marking eggs

5: Humidity:

Once the eggs have been placed in the incubator, it tends to lose its moisture during incubation. Therefore, maintain humidity in the egg incubator is very pivotal. Make sure all the time there is a small pan of water inside so that it retains the needed moisture. The changing weather would also affect the humidity inside the incubator, so you would have to adjust it accordingly.

water in egg incubator

The incubation period may be up to 21 days – so what you need to do is maintain the humidity percentage about 55 to 55(83o – 87o F (28 – 31 C). This should be done for first eighteen days, and for the last 3 days it can be near to 65 percent (89o – 90o F (31 – 32 C).

Note: placing a wet sponge inside the incubator can also increase the humidity.

sponge in egg incubator

6: Ventilation:

You need to maintain the flow of air inside the incubator – the shell takes in fresh oxygen to the growing embryo and releases the carbon dioxide. When the egg is about to hatch, the need for getting fresh oxygen increases.

7: Incubation duration:

The incubation period for a chicken egg should not be more than 22 days – usually the chicken egg hatching process ends in 21 days.

8: When to turn the eggs:

You should turn the eggs three times a day – once in the morning, then afternoon and then at night before going to bed. If you won’t do that, the embryo tends to get stuck inside the shell.

9: Eggs candling:

With this procedure you would see the embryo development inside the egg, and remove those which are of no use. However, you must carry this procedure after 8th day or 10th, and not after that. All you have to do is, darken the room, fit a big bulb in a small box and cut it in a manner that you can place one egg over it  if  you see head and eyes of chicks as a dark spot in pinkish color it shows embryo is live and if the color is brownish the embryo is dead.

candling egg

10: Incubation ending process:
  • You must not turn the eggs once they have been in the incubator for more than 16 days.
  • Don’t open the incubator if you don’t have anything important to place inside.
  • The chick obtained beyond 22 days are usually unhealthy.